Hello everyone and welcome to my blog.
I would especially like to welcome my new followers. Thank you ladies. Totally stoked to have you join me.
I would like to share a little tutorial with you. Actually it won't be all that little, there are a lot of photos. LOL
A little while ago I posted about a box I had made to hold a mini album and smash book on our New Zealand Cruise and I said I would show you how it was put together. I needed another box to hold the tags I have been making and I took photos along the way so I could show the process. You're probably thinking 'Well, that's bit silly, we all know how to make a box". I just hope I'm not wasting your time, but I was amazed at how simple it was to put together and you can use this process to make any size and type of box you need. So I hope you will stick with me to see the finished product at the end.
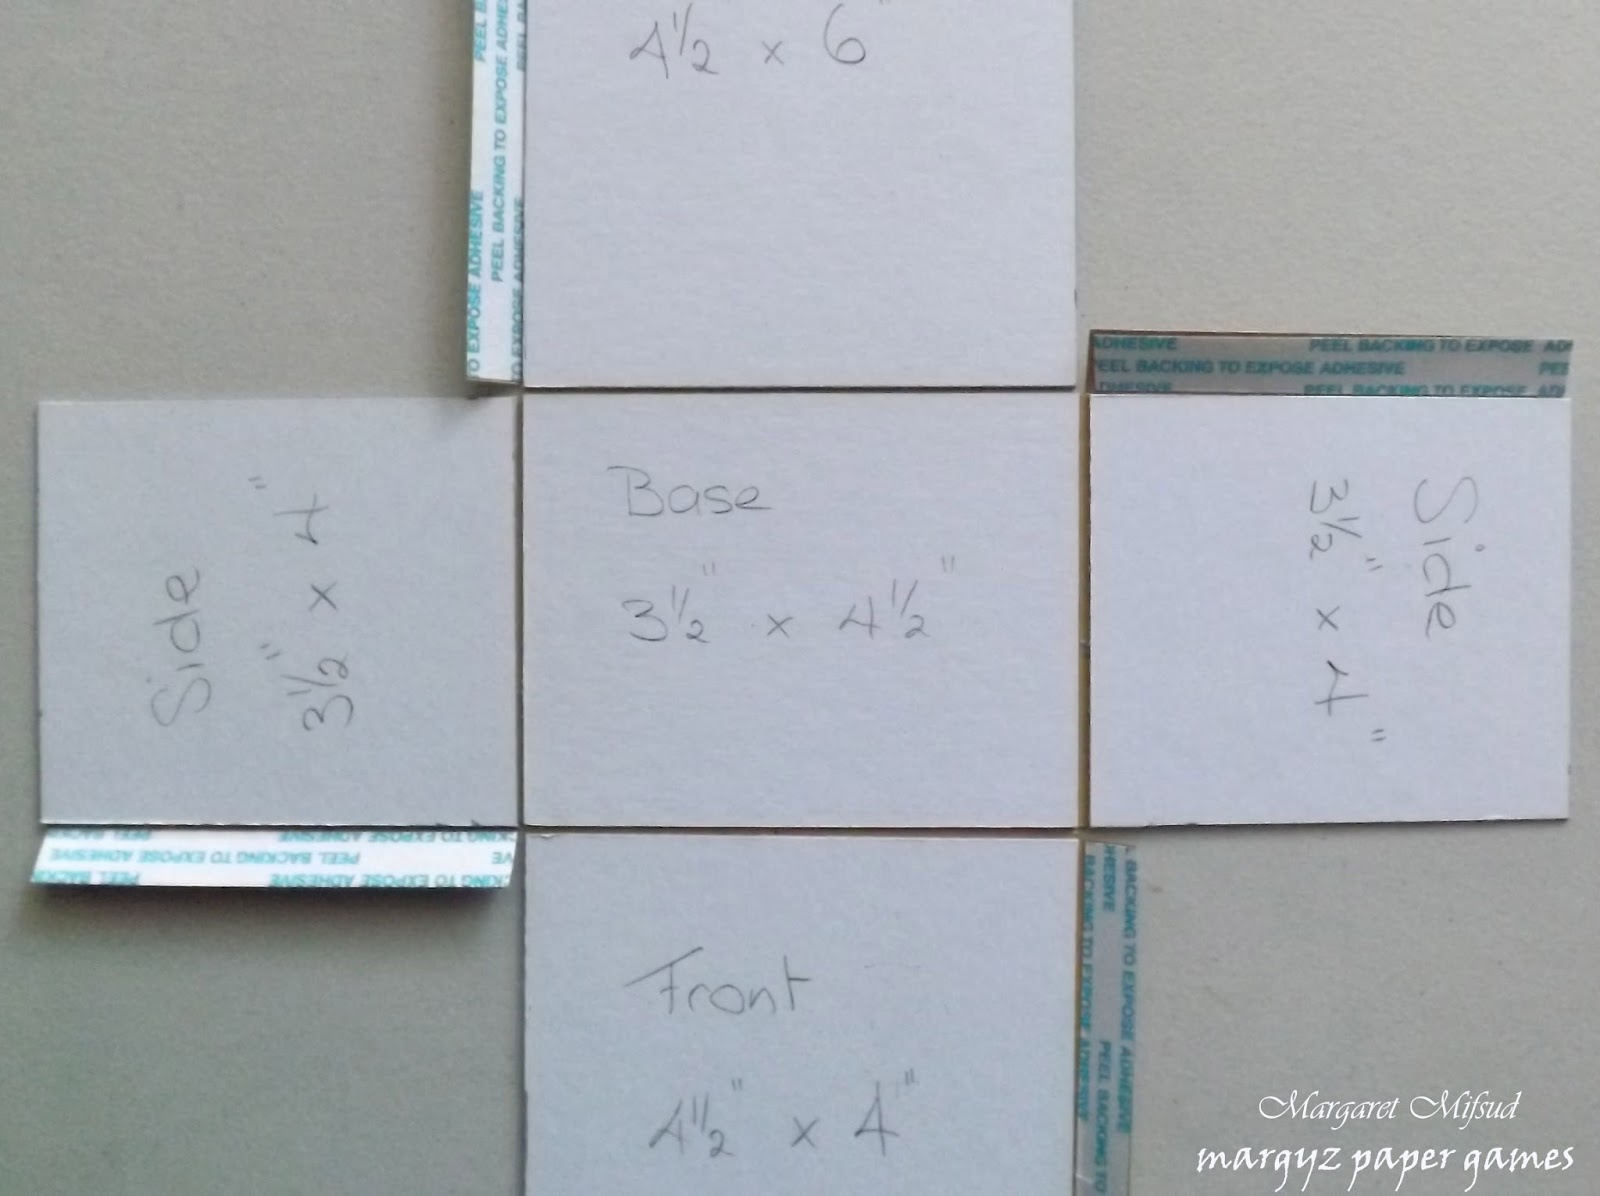
To make this box I used 2ml paperboard which I purchased from my Newsagent. You can get a huge sheet of it for only a couple of dollars. Then you need to decide on the measurements. My box had to be 3.5" x 4.5" on the base so that my tags would fit inside and I decided to make it 4" deep with a 6" back.
Here are the pieces already cut out and showing the measurements.
The base and the front ...

... the two sides ...

... and the back.

Next come the joiners. I need to tell you that these are not my own idea. I actually saw this on The Gentleman Crafter and they are brilliant and so easy to make. HERE is a link to Jim's blog.

You can use any cardstock you want. Colour doesn't matter because they get covered with paper. You simply cut as many 1" strips as you want ...

... score them down the middle ...

... and attach double sided tape on both sides of the score line.

Cut them to length and attach to all four sides of your base piece.

Then attach the front, sides and back leaving a small gap so that there is room to fold each piece up.

You then need to attach a joiner to one side of each piece as shown ...
... adhere the sides together ...

... and then the back.


There you have it. Now all you need to do is cover with paper and decorate any way you like. If you want a box with a lid you just need to make all sides the same height and then make a lid exactly the same way but make the base or top piece just a bit bigger so it will fit over your box.

How easy is that? I actually found this a lot of fun and have thought of a lot of different boxes I wish to make. I've also made heaps of the joiners so I've got some handy whenever I need them.
Here is the finished product.
I rounded the corners on the back and covered the box with Prima's Nature Garden papers. I've inked all the edges with Walnut Stain Distress Ink.

Used one of the Nature Garden Tags on the front along with a Prima flower. The title was cut using my Silhouette Portrait.

I decorated the back with a chipboard button on which was mounted a metal butterfly.

The box with the tags inside ...

... and with a tag pinned to the front. I can easily attach whichever tag I'm in the mood for.

I hope you've enjoyed this post and I haven't confused anyone too much. If you have any questions please don't hesitate to ask.
Thank you so much for visiting and I hope you take the time to leave a comment. I'd love to know what you think.
Take care and God Bless.
oxox Marg

Take care and God Bless.
oxox Marg
Actually this is a great tute on making a box, I have not seen the sides joined like that before so this was new to me!!and your end result looks wonderful.. I like the idea of displaying a different tag every now and then too!!
ReplyDeleteLOVE this Marg. I've made boxes before but all in one pieces and the measurements are a nightmare. Thanks.
ReplyDeleteBrilliant project Margie, totally love how you made that box!!! (Funnily enough I am posting an album tomorrow made in a very similar way, - great minds lol)...And the tag of course looks fab too!!. Great and very clear step by step, I may well make one of these soon, so thanks for the inspiration!!
ReplyDeletewonderful box, thanks for sharing :)
ReplyDeleteJuat beautiful Margaret!!! love the box and the instructions just great thanks -lindy xo
ReplyDeleteWow, this is such a gorgoeus little box, Margaret! I must pop back when I've got more time to give your tutorial a go :)
ReplyDeleteThank you for sharing your lovely box! Super super super stinking cute! Love the way you decorated it!
ReplyDelete